Hatches with magnets
Latest updated Monday, October 24, 2022, 2 comments
Written by Gustav Borreman
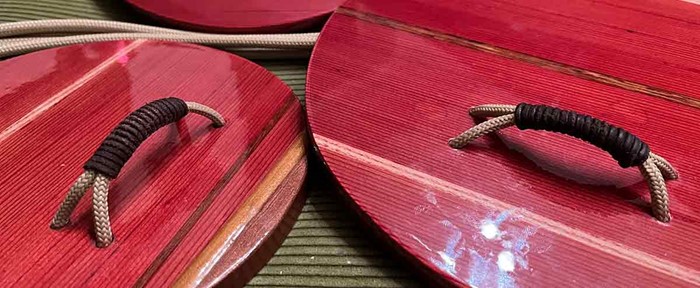
Making these hatches proved to be really time-consuming! Wow, I think I have easily spent 20 extra hours in the shop. But seeing the result it was absolutely worth it. Besides the good looks, I have more space under the deck because there are no recesses, and closing the day hatch in waves is really easy – the magnets always end up in the right position, on top of each other.
This way I can close the day hatch with one hand without even looking/turning around… nice bonus.
I have followed Rob Macks’ method. I stumbled upon nice tutorials from his company Laughing Loon on youtube, and eventually purchased an instructional dvd on hatch making.
Key things I found out while working on the hatches:
- Choosing wood for the spacers and lips that is soft enough to bend.
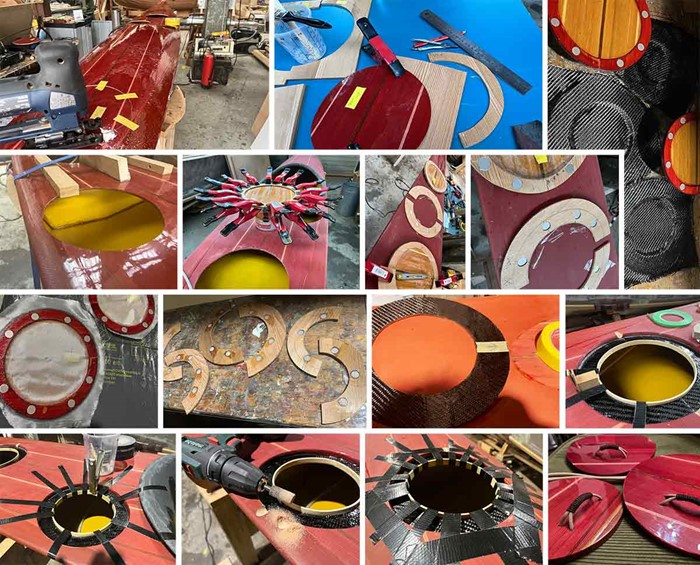
- When covering the deck magnet rings in graphite, I taped the foredeck ring to the concave deck to let the epoxied carbon mat harden with the curve.
- Rob Macks uses a thin veneer to cover the magnets in the deck lip.
- Work the magnets in the holes in the deck lips/hatch rings as tight as possible, and make sure they are perfectly sealed against moisture
Construction:
- Mark the polarity of every magnet to prevent mistakes.
- I rounded the underdeck outside edges of the magnet rings and spacers before coating them in three layers of epoxy, to minimize hang-ups with stowing gear in the hatches.
- Get the right size and holding power for the magnets! Mine were 18x3mm, holding-power of 3.1kg.
- For the inner lip edges, that are pulled into the rubber seal, I used very straight-grained yellow cedar (bowwood). This was easy to bend using a heat gun.
- These inner lip edges need to have a constant height to ensure an even positive press into the hatch seal rubbers
- For the seal rubbers, I am still on the lookout for the perfect, one-piece solution. At the moment I have a 3mm closed cell HDPE tape, 1cm wide. This tape shrinks a bit when wet, leaving a tiny gap. My hatches are almost dry when touring, but an hour of rolling gives some water ingress. I am planning to cut closed rings out of sheet rubber or neoprene, but sourcing the right hardness takes some time.